3D Printing Robotic Cat
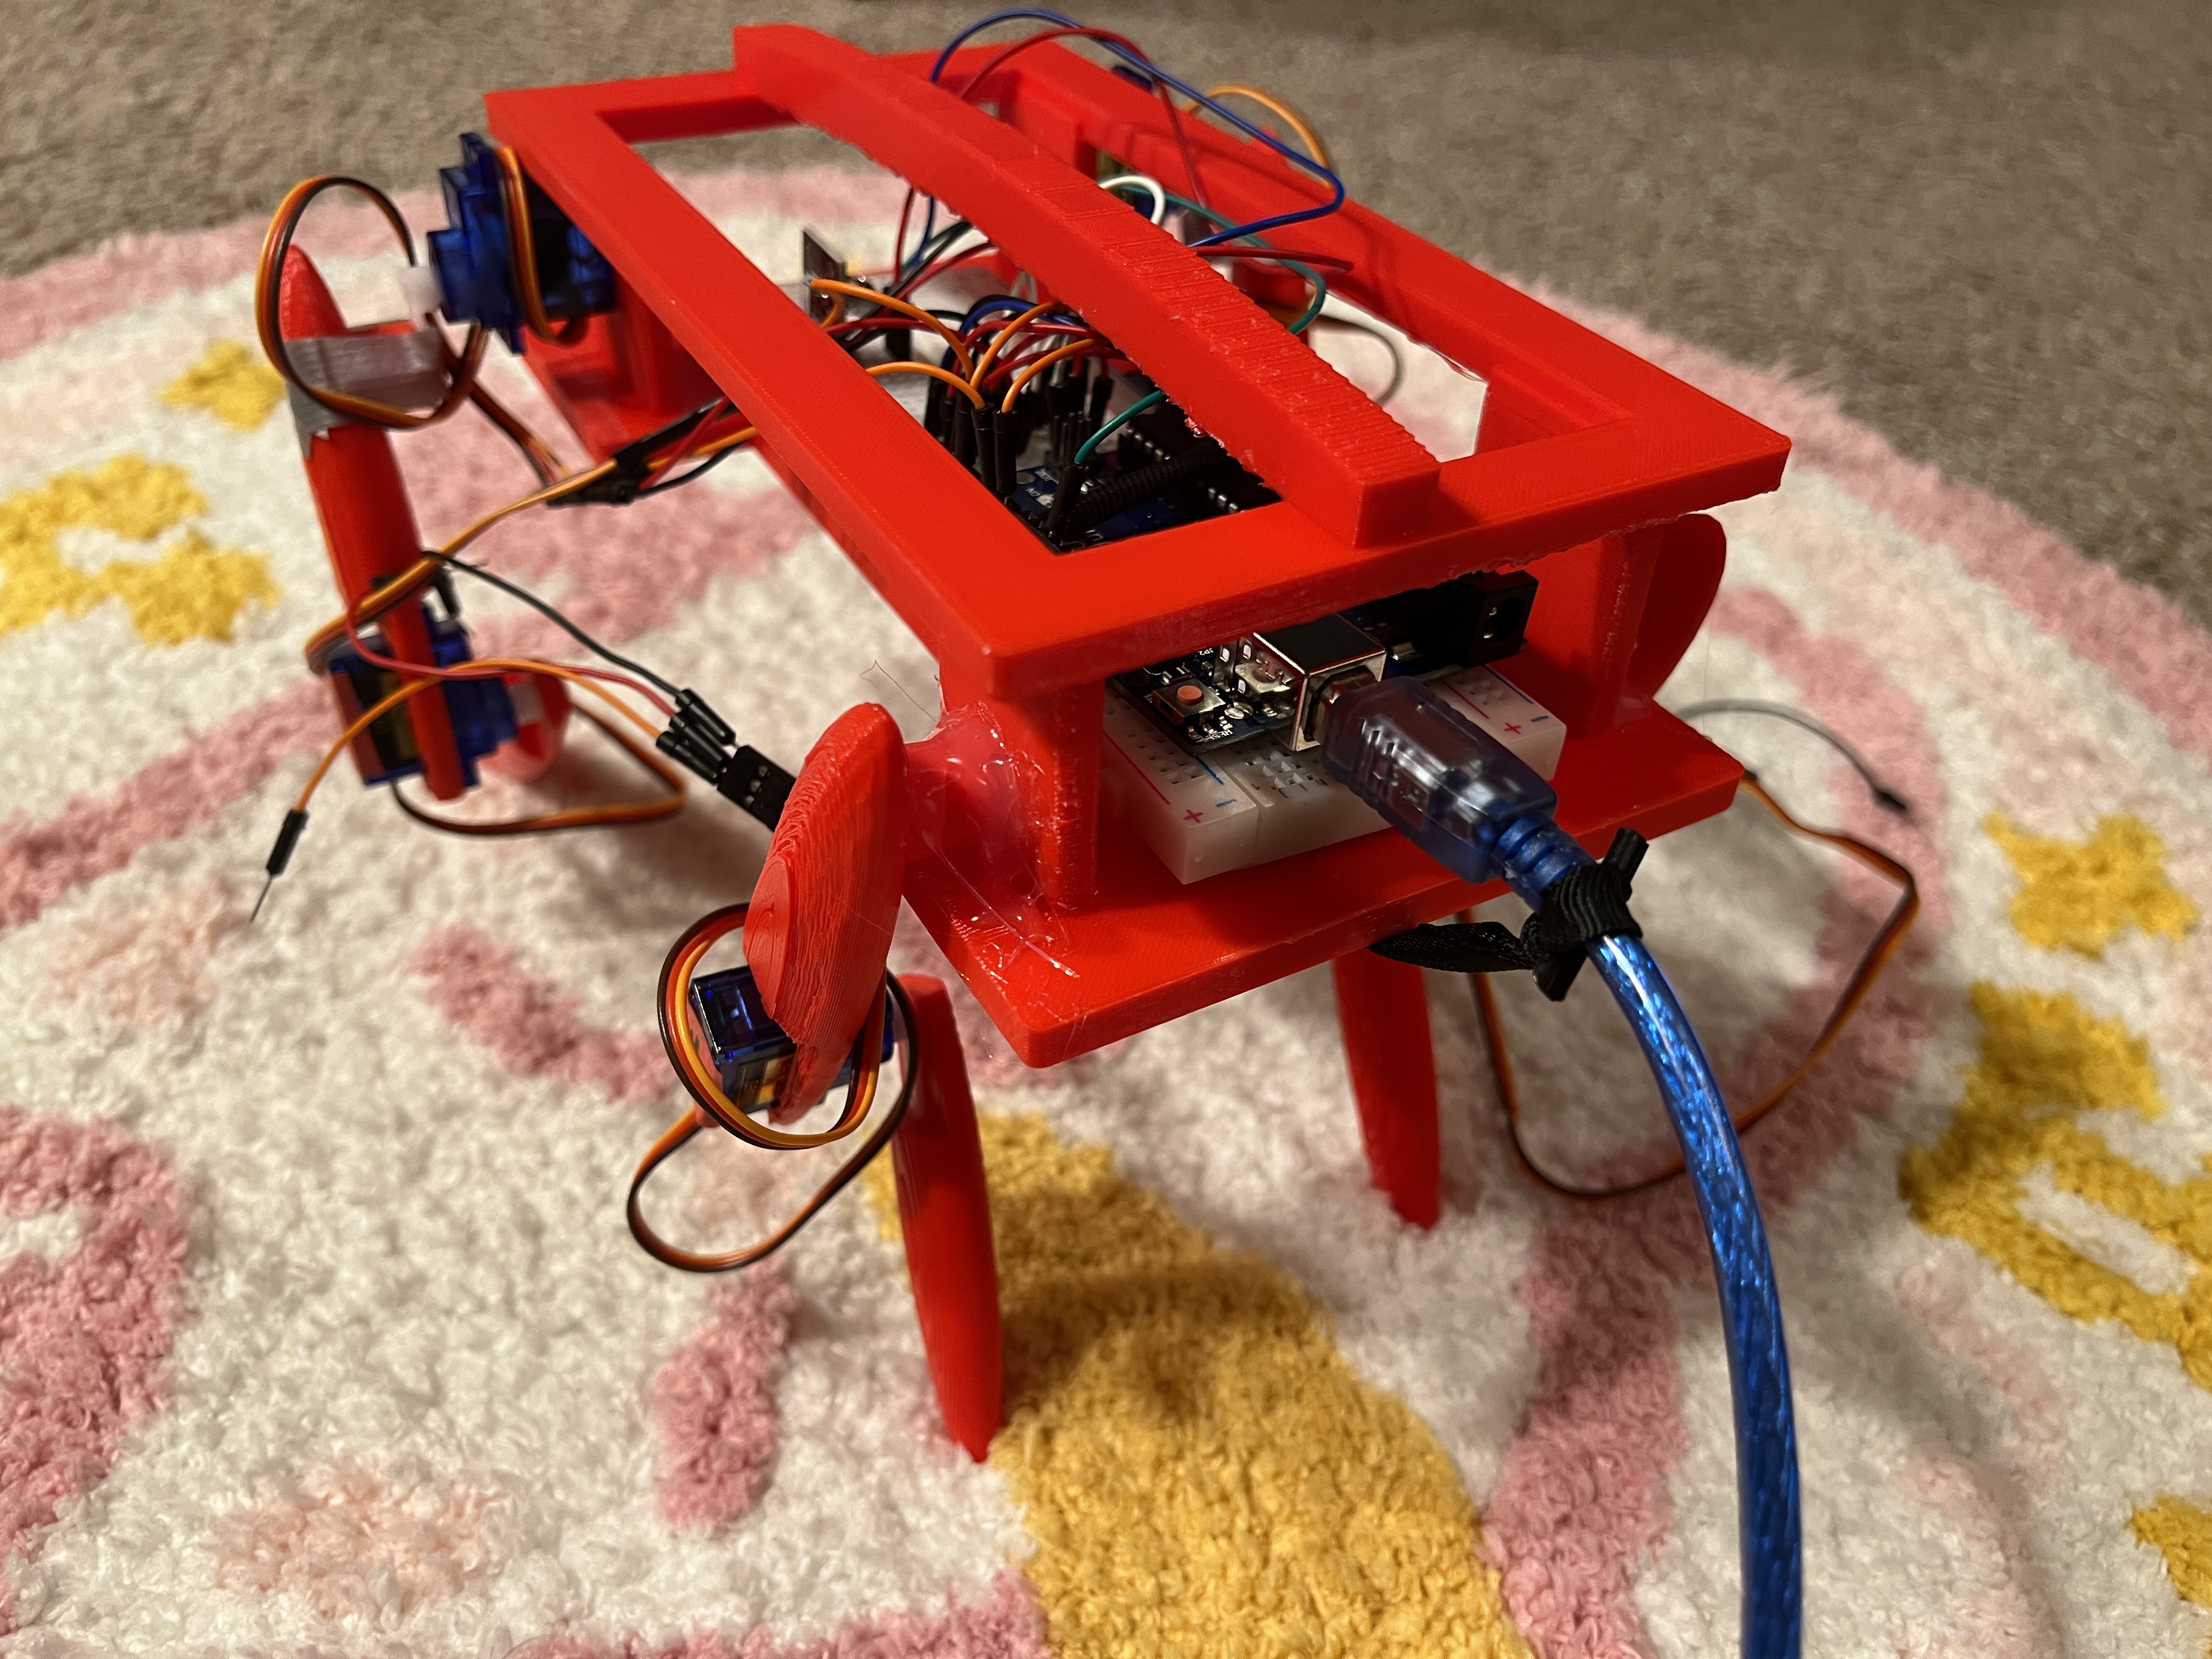
The final project theme I chose for this semester’s CS F453 3D Printing & Robotics class is to make a robot cat. The cat’s basic body parts, such as legs and torso, are 3D printed from PLA material. The joints used to connect the body, thighs, and calves are S51 (SG90) servo motors, which are also used to make the cat perform various movements. The entire circuit is connected and controlled using Funduino Uno (similar to Arduino Uno). The activity range of the servo motor arm is compiled in advance in Funduino Uno, and an IR remote controller is used to control the action combination.
A quick overview of my robotic cat:
The motivation for this project… is that I never had the chance to own a real cat, so now I’m going crazy XD
Source of Inspiration
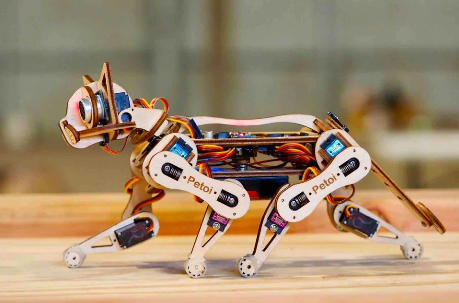
My inspiration came from Nybble, a STEM teaching robot cat currently on the market. It is controlled by 11 servo motors, implementing 11 dimensions of freedom (DOF). My project only used Nybble’s appearance design without exploring any of its code, because it sells for more than 250 dollars, which is quite expensive for me!
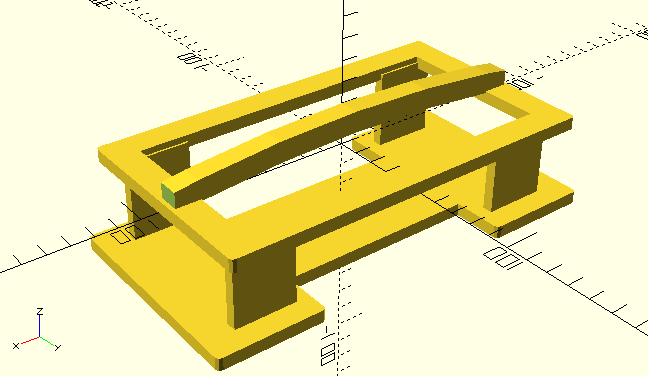
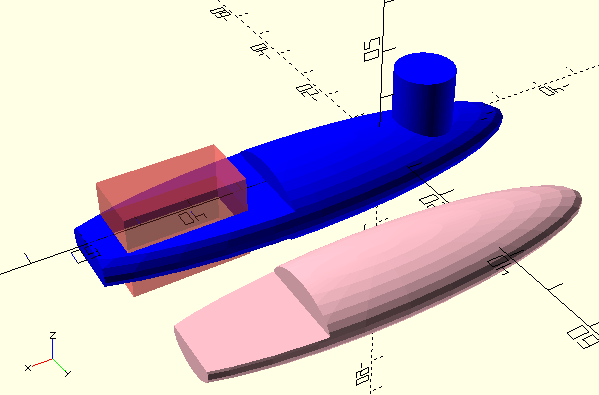
CAD Design
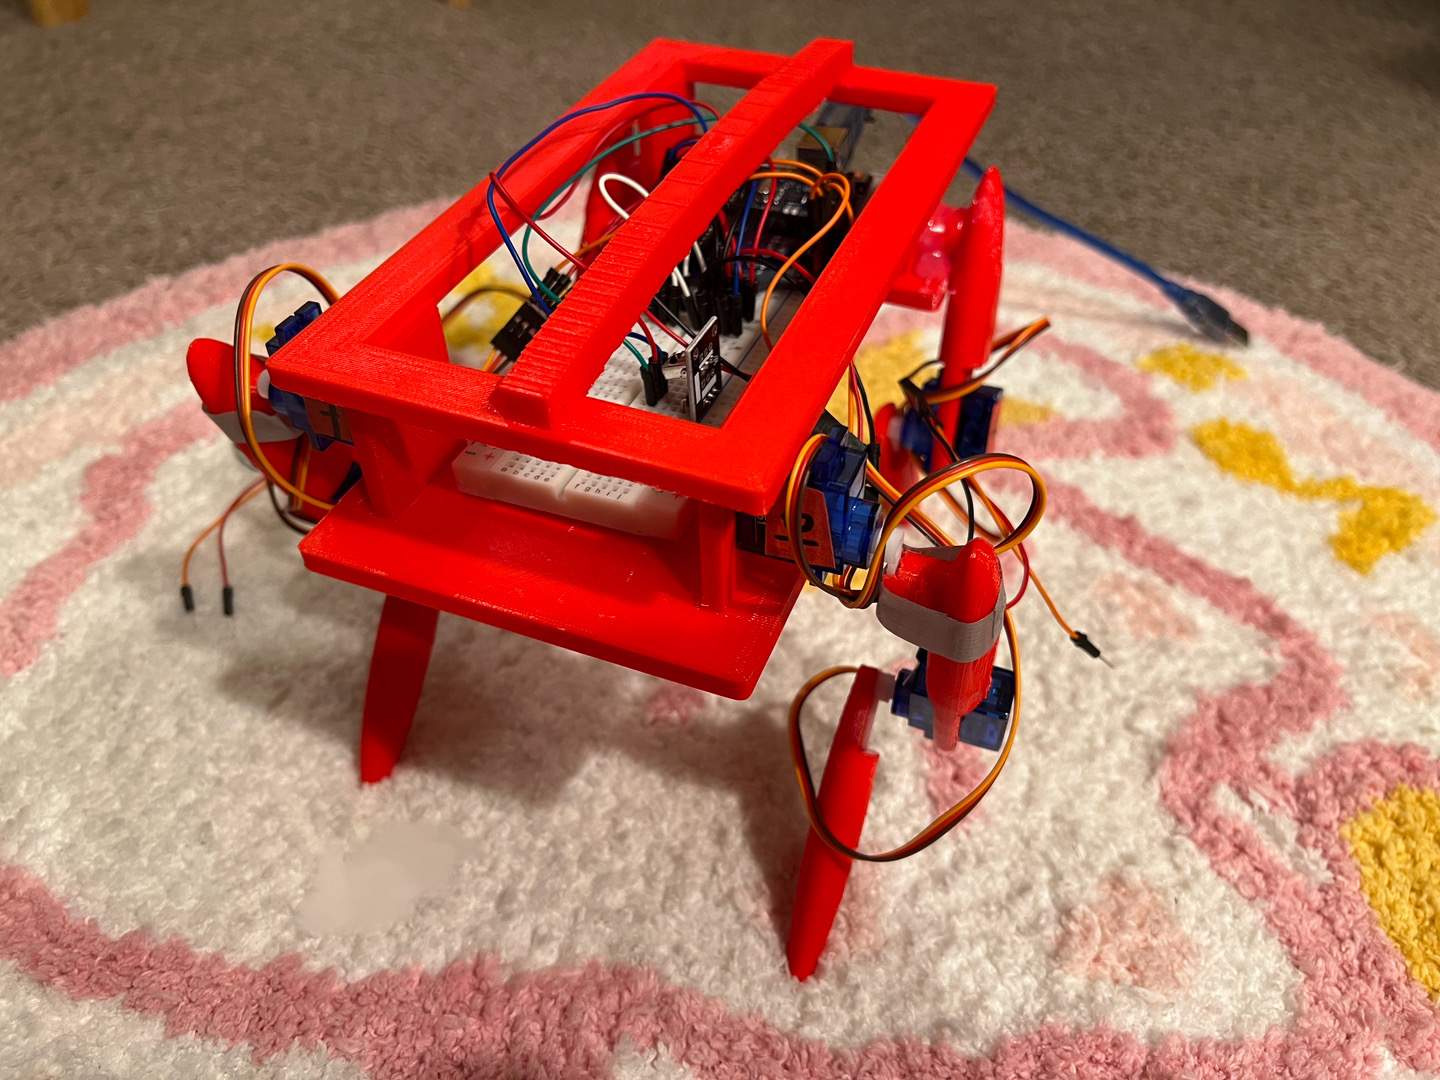
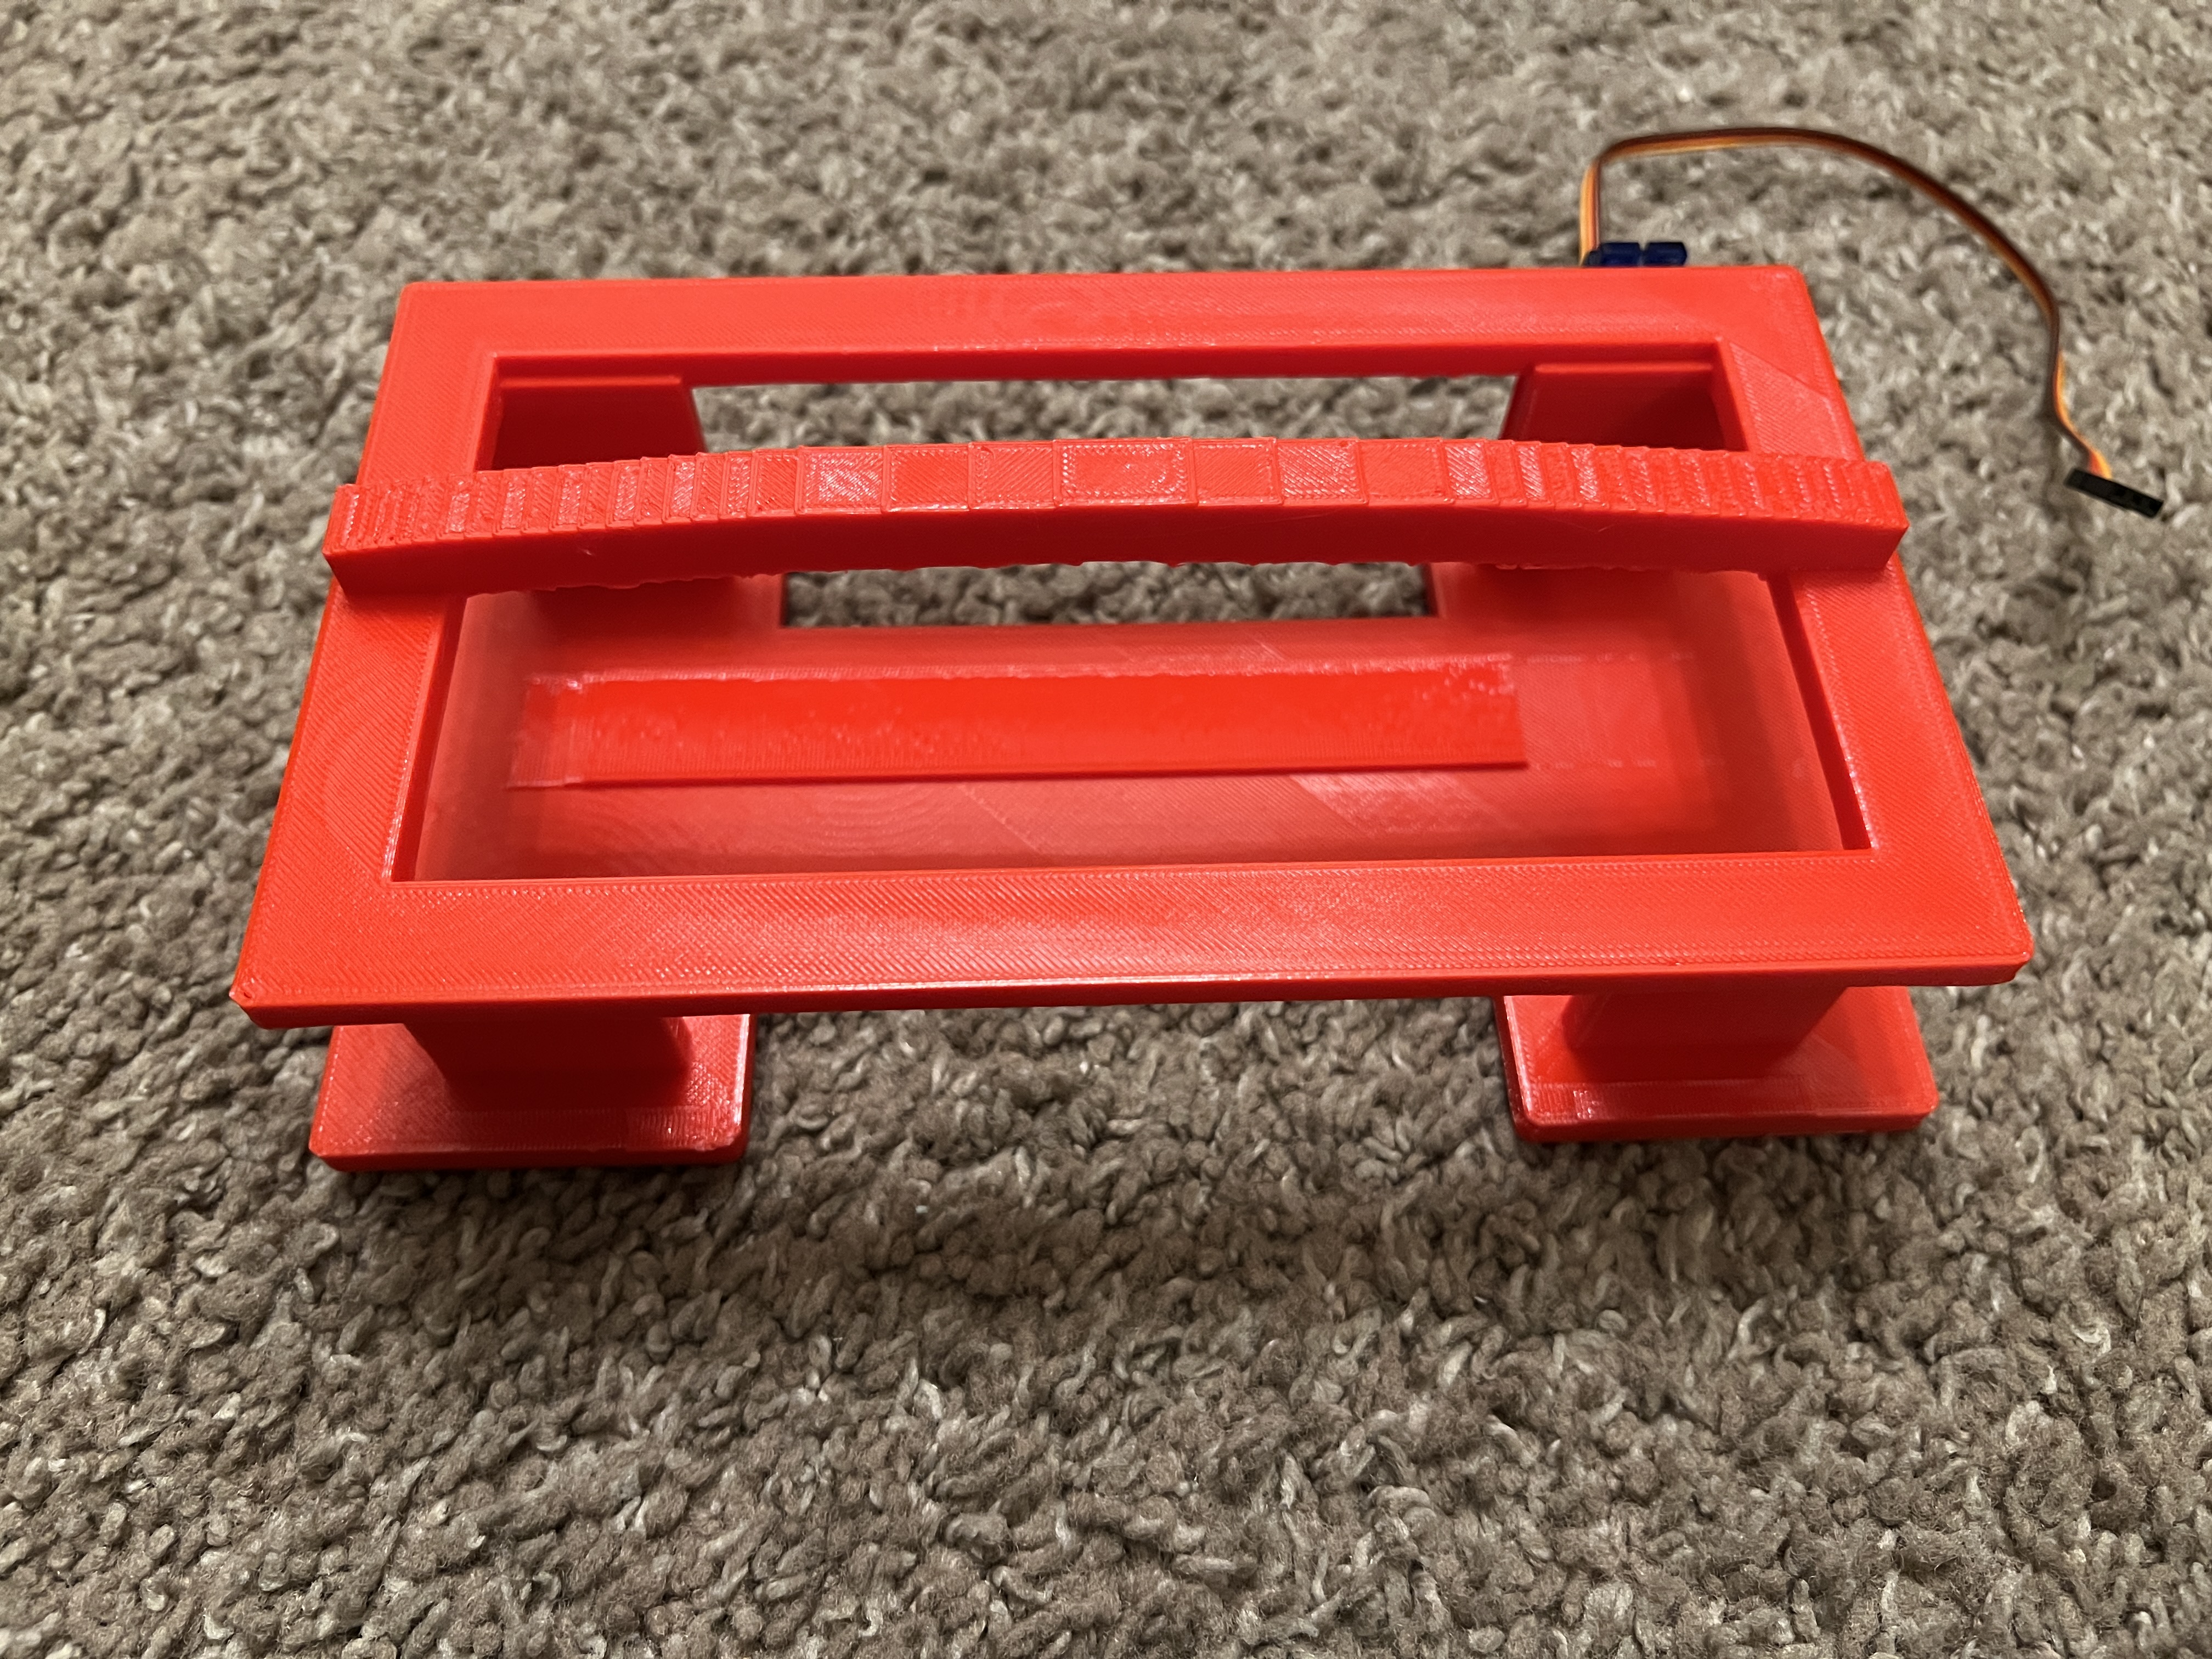
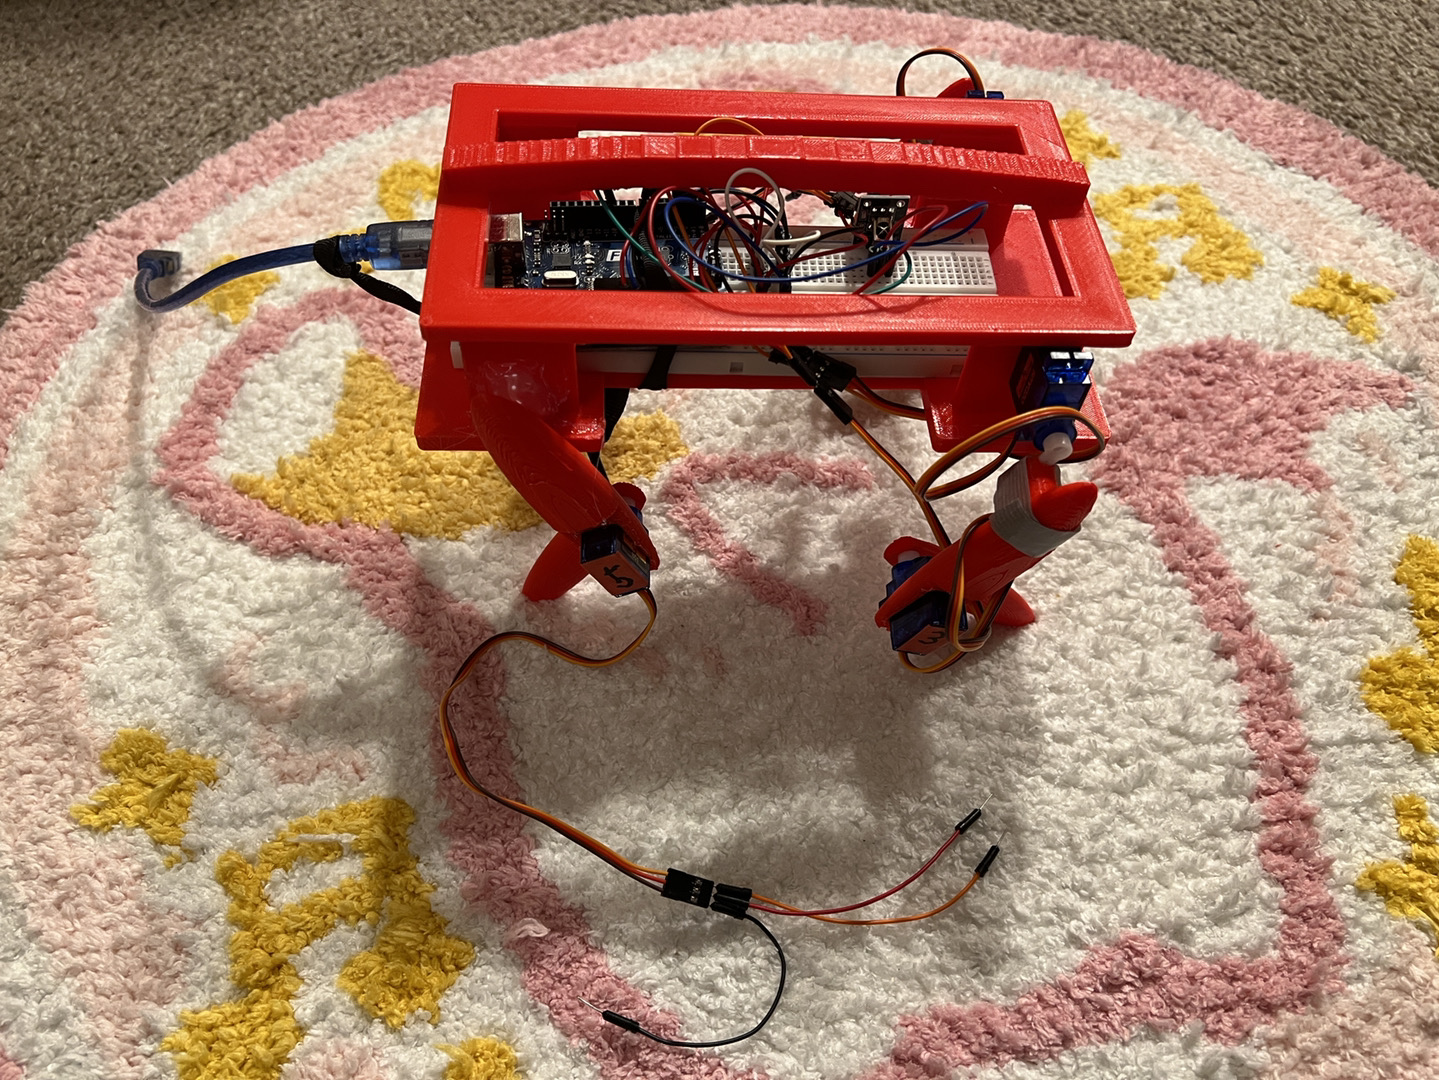
The cat’s body frame was printed in one piece, and the space in the belly was reserved for Funduino Uno, breadboard, and circuit connections.
The printed cat body was like this, not very perfect, and some supporting materials in the belly part were pretty hard to remove.
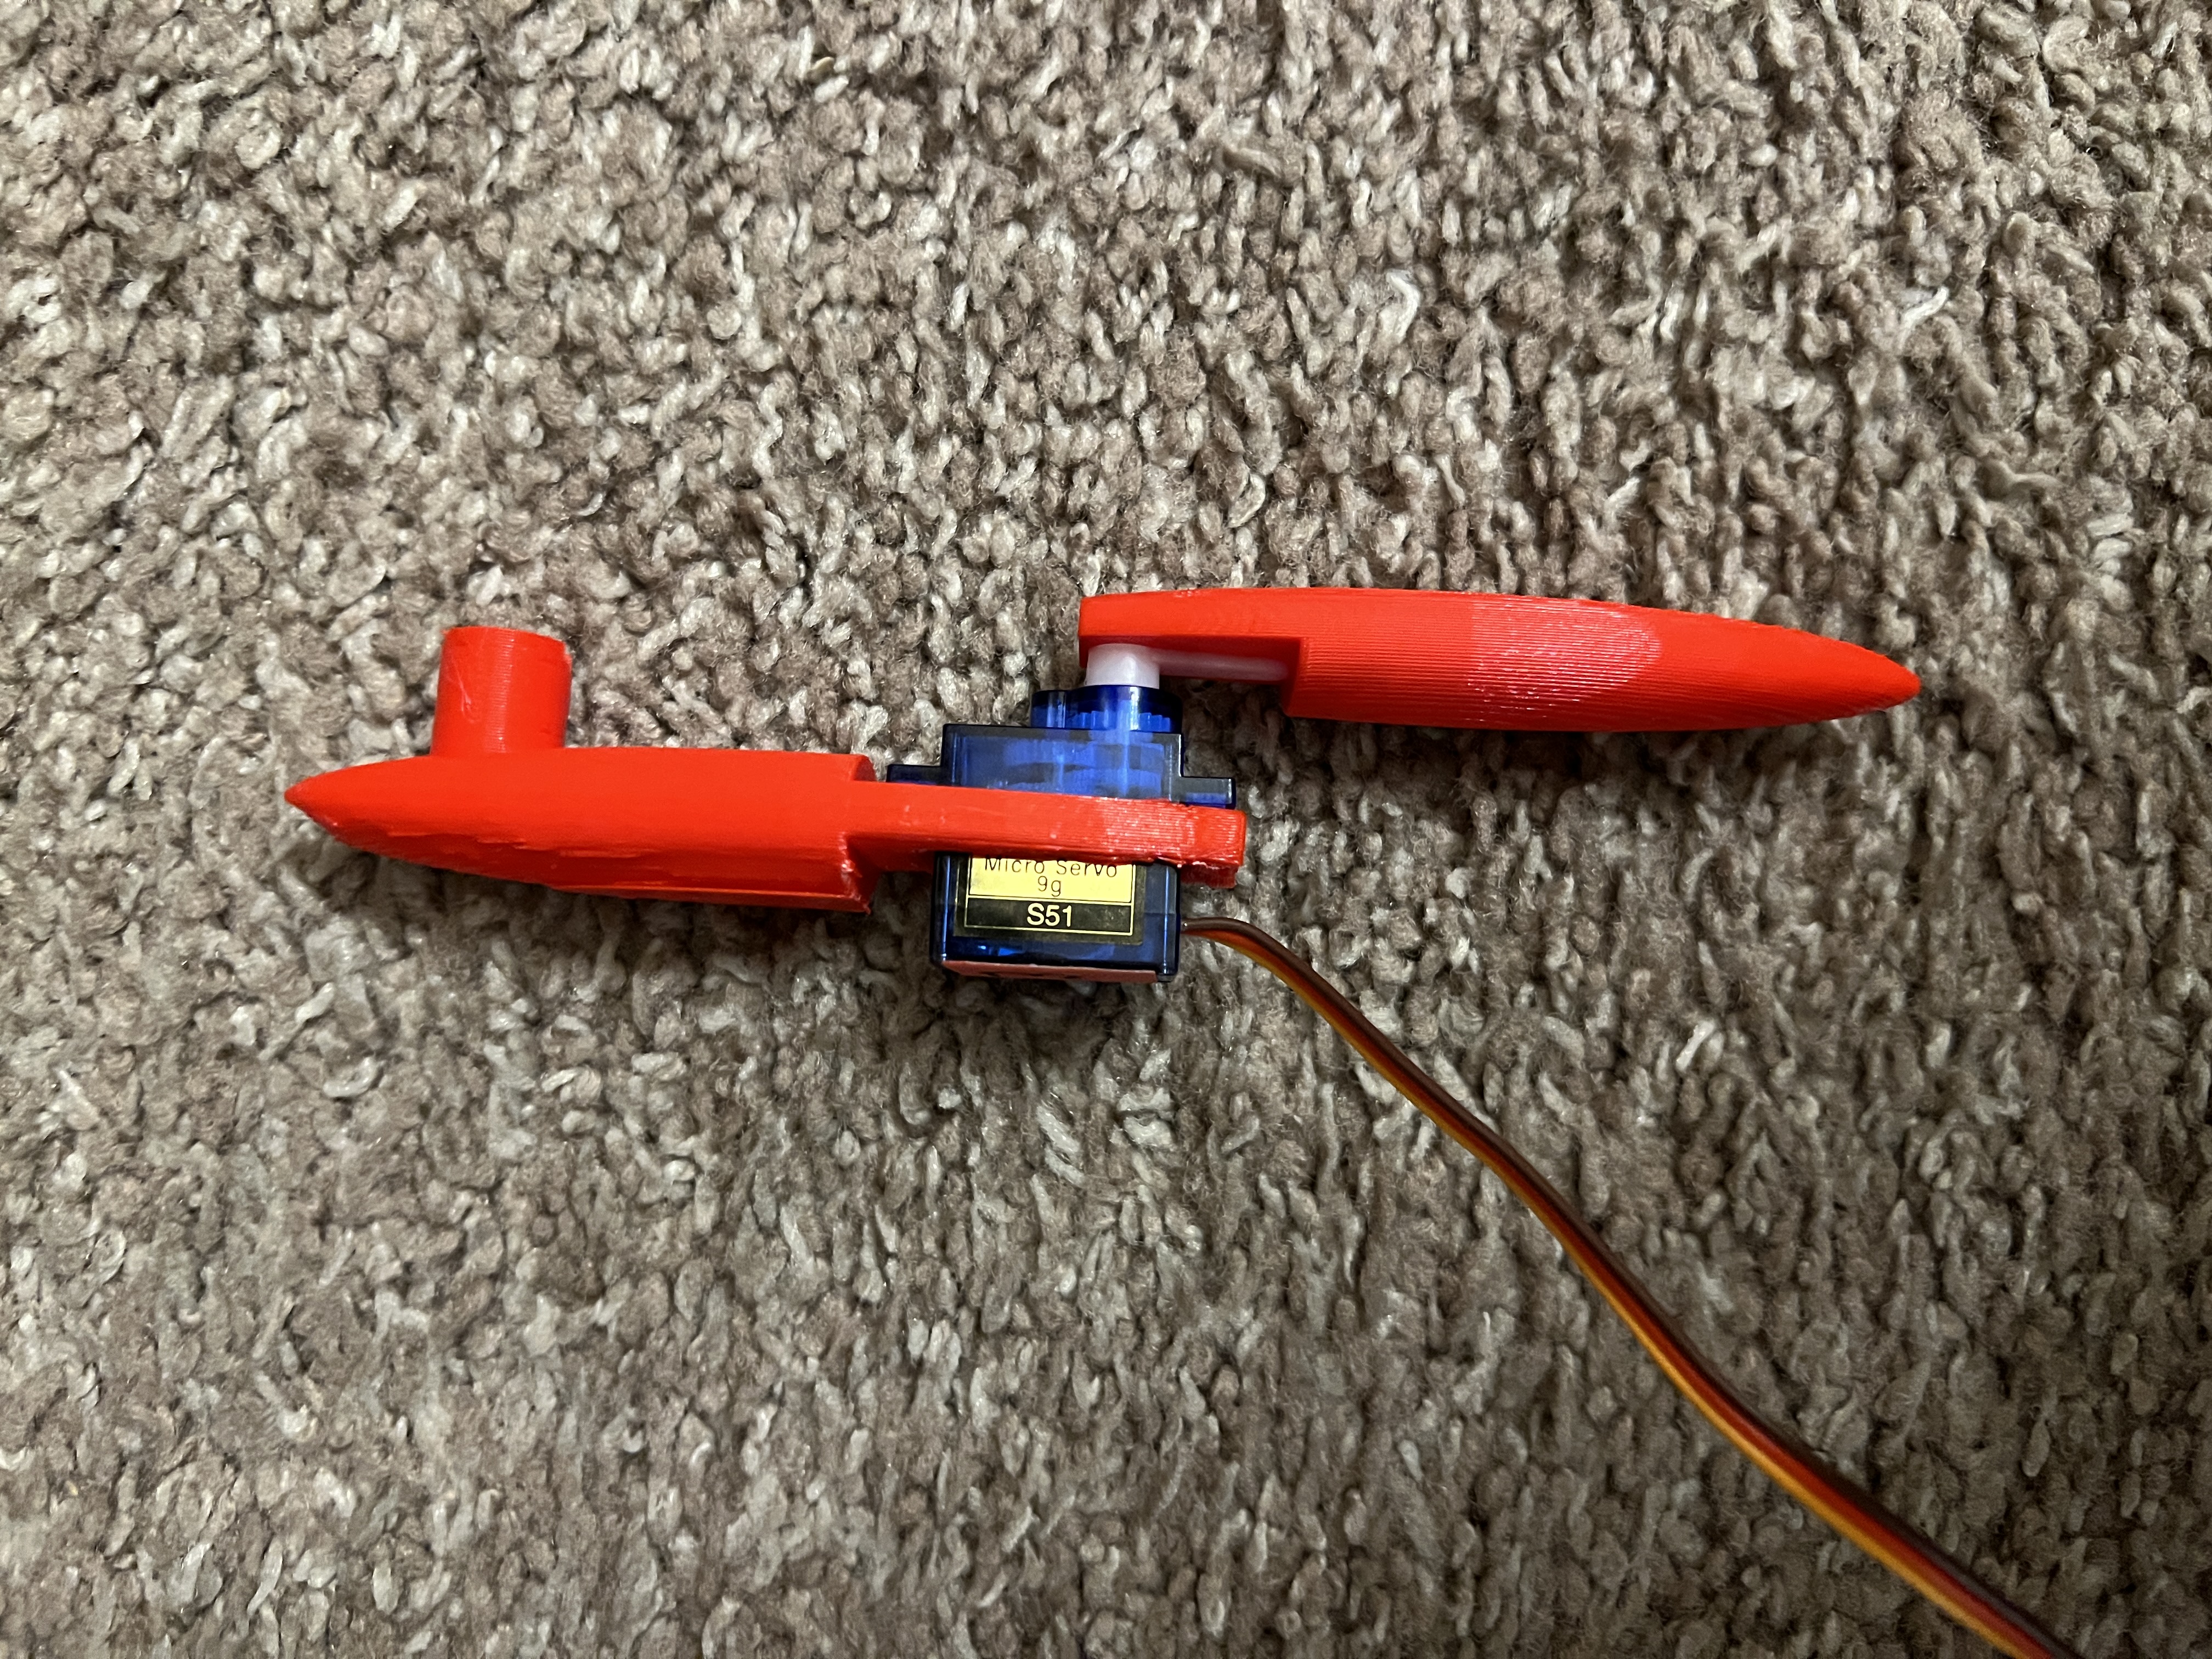
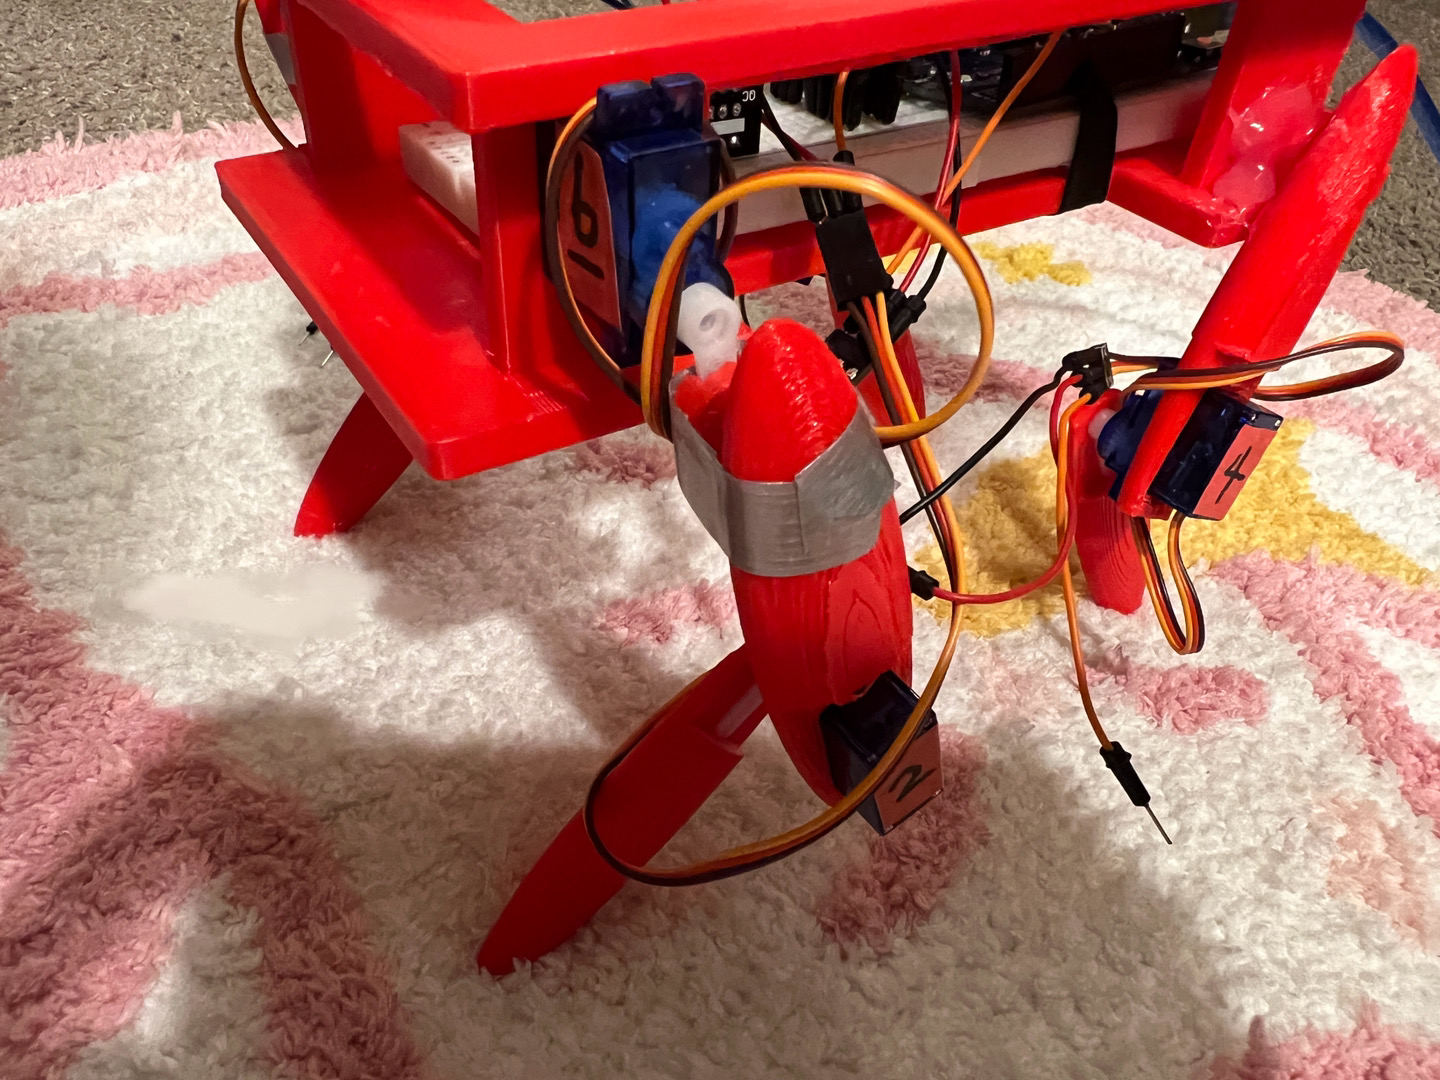
The thigh left a space that matches the size of the S51 servo motor so that after printing, the servo motor can be embedded into this part to connect the calf.
The arm of the servo motor was fixed to the calf with strong glue. Super glue worked surprisingly well for this project and securely held the parts together.
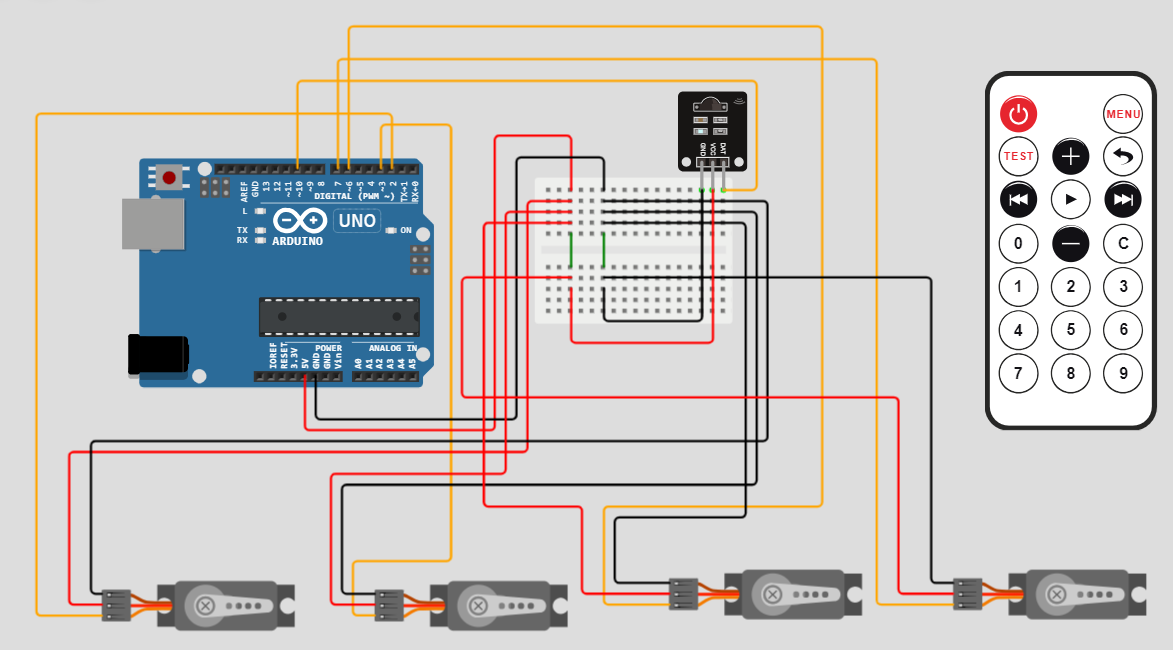
Funduino Connections
Originally, I wanted to use 10 S51 servo motors in my project: 2 for each leg, 1 for the tail, and 1 for the neck. However, considering the current and power withdrawal (see What Didn’t Work section) and I didn’t have an available battery compartment with positive and negative wires (I only had a battery compartment with a barrel jack), I ended up connecting only four servo motors to the Funduino Uno and powered the entire circuit using a power bank (max USB output 5V/2.1A). The board was chosen as Arduino Uno in the Arduino IDE because Funduino Uno is pretty much similar to Arduino Uno. Six motors are used, four of them are connected in series to Funduino Uno; the two left motors were not used due to concern of power; I used the IR remote controller and IR receiver 1838 to control the servos. From the remote controller, button “1” is back to the initial pose, button “2” means bend down, button “3” means rise a little bit, and button “4” means stretch on the front legs.
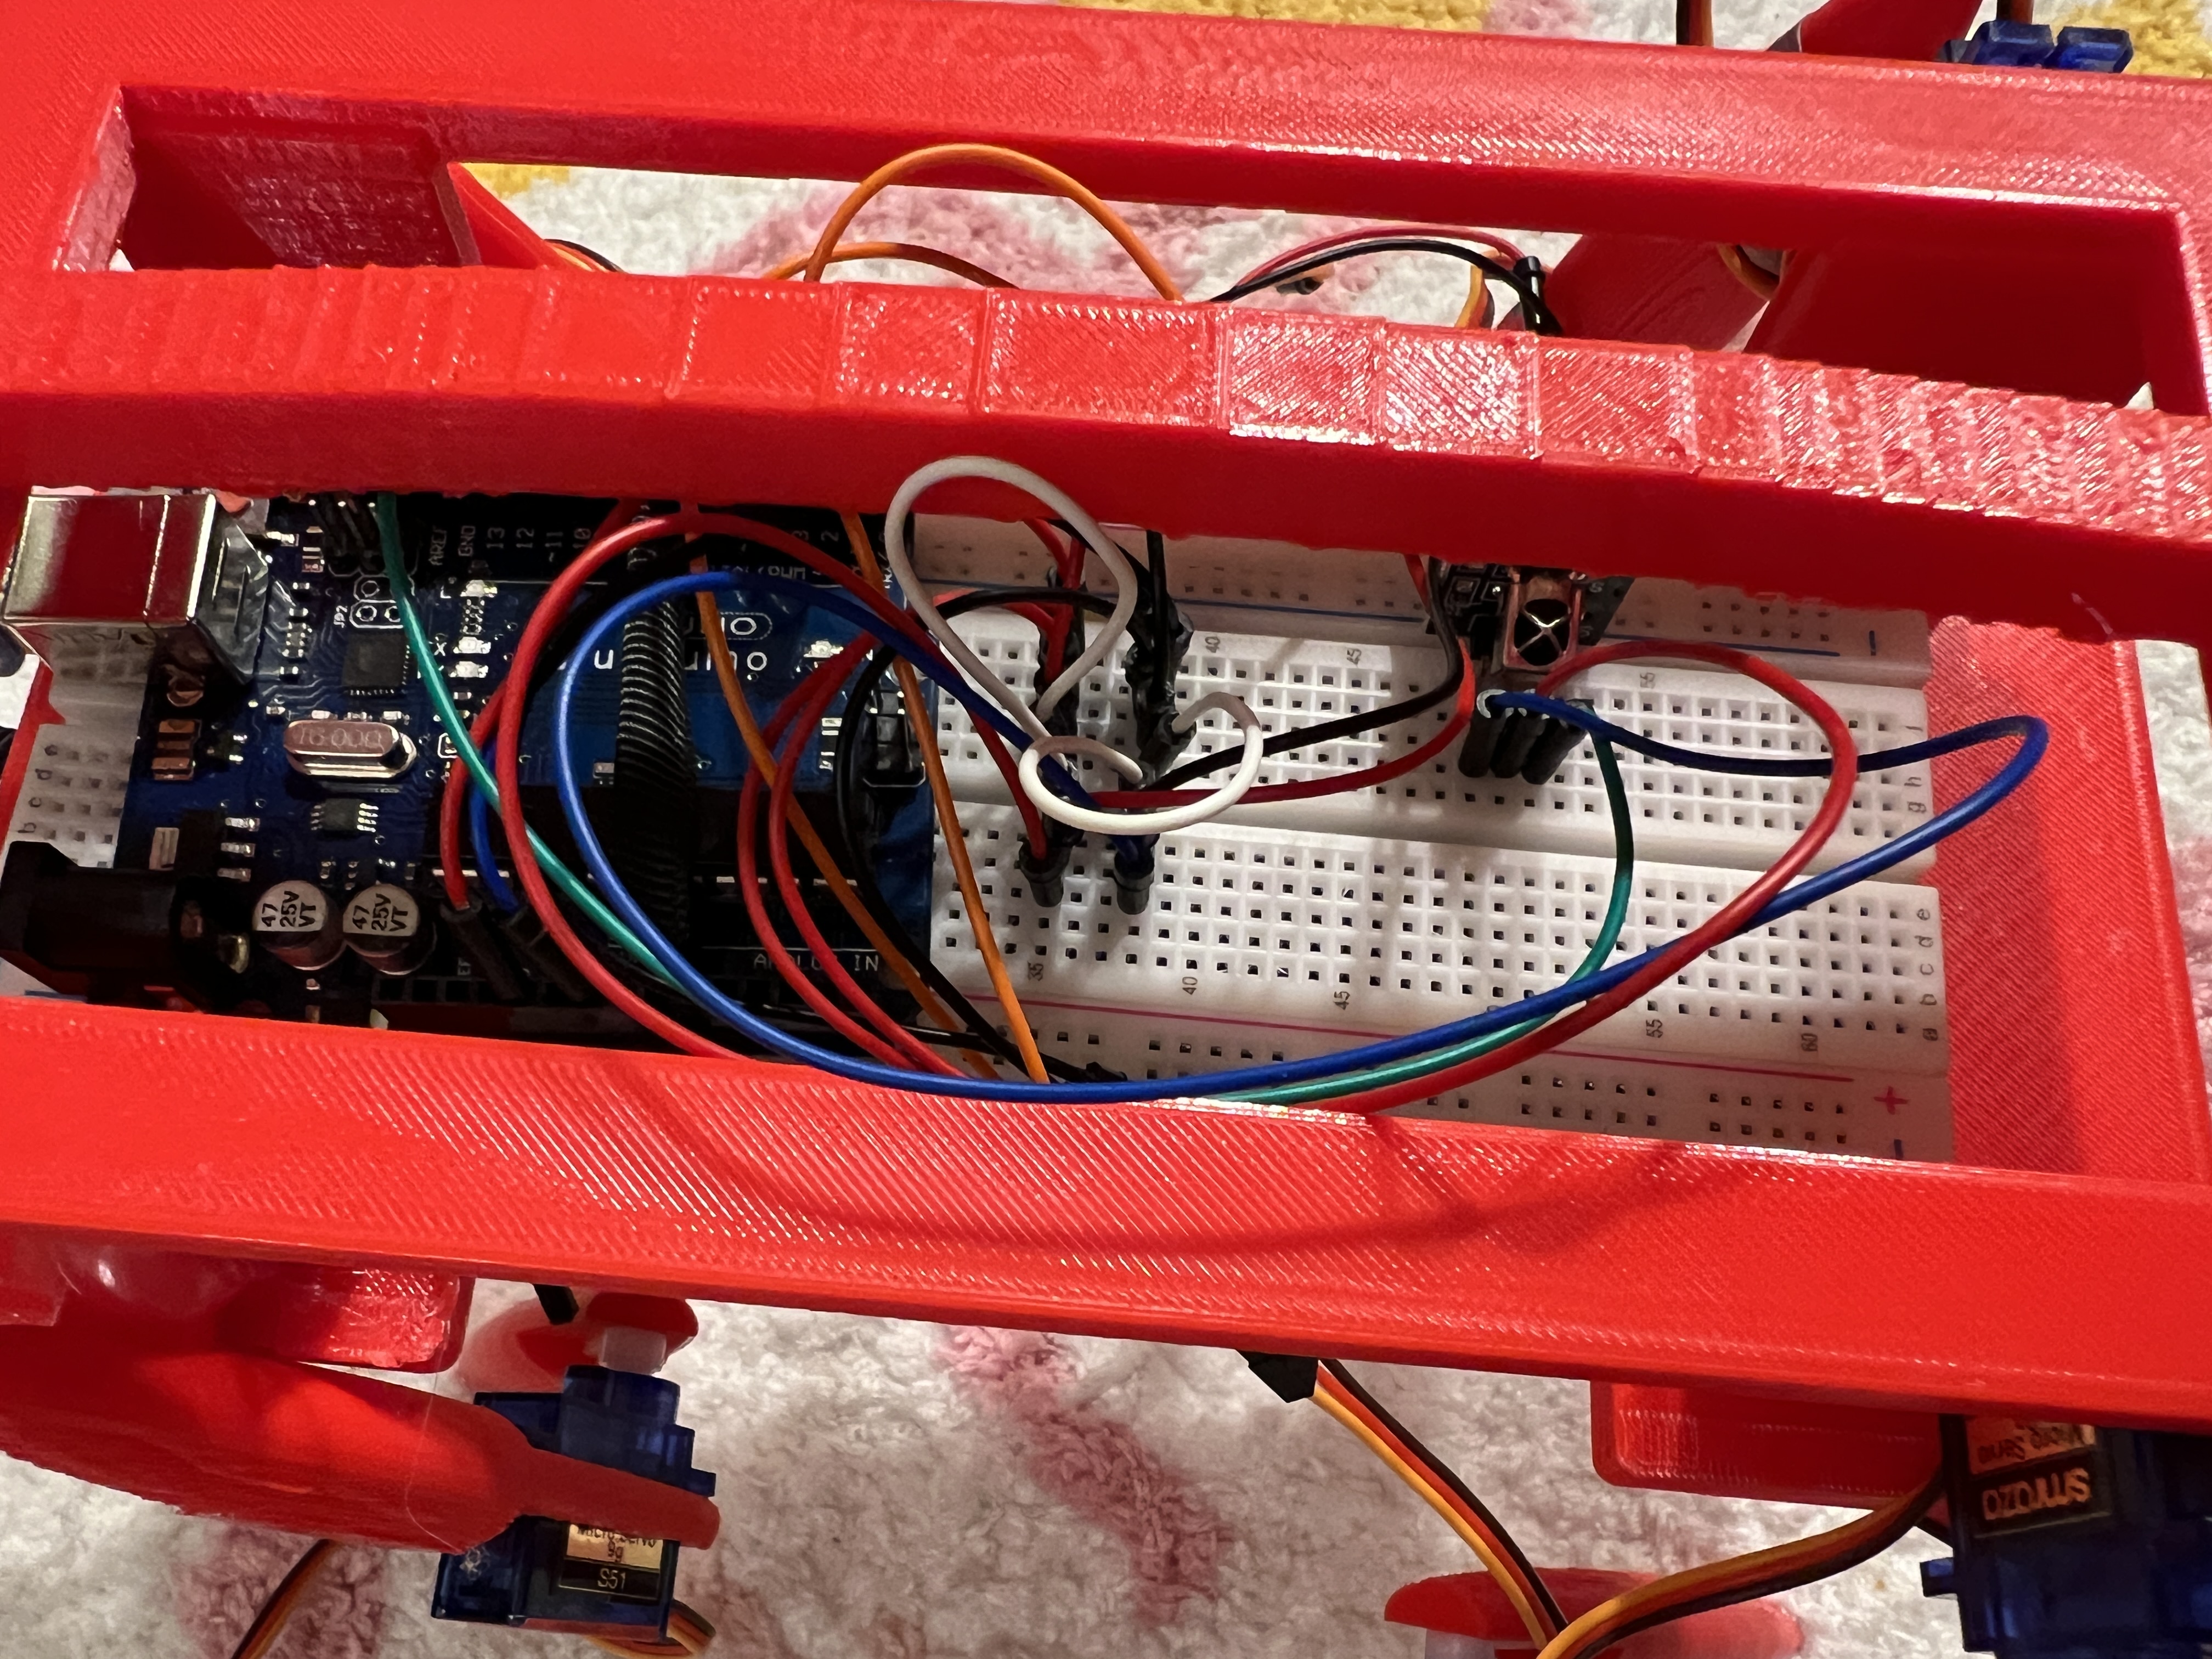
The circuit and breadboard are all lying inside the belly:
What Worked
- 3D printing was going well in general;
- All parts were delivered without damage (although I ordered SG90 and they shipped S51, these two types basically work the same);
- Servo motor connections were all good and moving together;
- IR remote control works well;
- Although a little bit struggling, the servo motors successfully support the heavy cat body frame;
- The assembly took some effort, but I was glad everything didn’t fall apart;
- Some parts are reinforced using duct tape just in case the cat shakes wildly during movement;
- The two back legs were directly glued to the body frame using a heated glue gun since they don’t need to move (for now).
What Didn’t Work
- At least 8 SG90 servo motors should be used according to the initial plan, while I finally went with 4:
- Controlling 8 SG90 servo motors at the same time will withdraw larger currents. When the SG90 servo motor is subjected to a large gravity, its peak stall current can reach 750 mA. The S51 that I used even had a stall current of 1300±40mA (4.8V ). If there is insufficient additional power, such an operation will likely damage the circuit.
- The SG90 servo motors seemed to be struggling to support the body frame:
- The max torque of SG90 servo motor is 1.6 kg-cm (0.157 N⋅m), which should be strong enough; the S51 servo motor that I used had even more stall torque (at locked): 2.0±0.20kg·cm (4.8V ) 2.2±0.20kg·cm(6V), but the stall
- current (at locked) is higher too: 1300±40mA (4.8V ) 1600±50mA(6v). Using too many servo motors without an external power supply may damage the circuit.
- The circuit board + Funduino Uno board might have added too much weight to the belly of the frame, making the servos struggle a little bit to raise the body (rise pose).
Lessons Learned
- Stall current? Shear strength on each foot? I’ve learned many new items outside my CS comfort zone;
- Should better use an external power supply for all the servos; in this case, I shall be able to add more servos;
- When designing CAD for 3D printing, should leave enough space for very small parts like wires too (for example, the 3-wire output opening of the S51 servo motor);
- Consider the overall weight of the frame; can choose stronger motors like stepper motors;
- A cat should have a head…
More Photos & Video Demo
Here are more photos and a video Demo of my robotic cat:
Video demo:
Reference
Appendix
A. S51 (SG90) Servo Motor Specification
Source: Amazon Link that I Purchased the Servos from
Control Specification:
- Control system: Change the pulse width Amplifier type: Analog
- Controller Operating travel: 180°±1° (500→2500 μsec) Left&Right
- Travelling Angle deviation: ≤ 6° Centering deviation: ≤ 1° Neutral
- Position: 1500 μsec Dead band width: 5 μsec Rotating direction:
- Counter Clockwise (500→2500μsec) Pulse width range: 500→2500 μsec
- Maximum Physical Angle: About 200° (Manual control)
Wire Layout:
- Electrical Specification (Function of the Performance): Operating speed (at no load): 0.09±0.01 sec/60°(4.8V ) 0.08±0.01 sec/60°(6V)
- Running current (at no load): 400±30mA (4.8V ) 500±30mA(6V)
- Stall torque (at locked): 2.0±0.20kg·cm (4.8V ) 2.2±0.20kg·cm(6V)
- Stall current (at locked): 1300±40mA (4.8V ) 1600±50mA(6v)
- Idle current (at stopped): 6±1mA (4.8V ) 6±1mA(6v)
- Running life(at no load): >350000 Turns(4.8V ) >320000 Turns(4.8V )
Mechanical Specification:
- Limit angle: 180°± 1°
- Weight: 9 ± 5%
- Connector wire gauge: #28 PVC
- Connector wire length: 250 ± 5 mm
- Spline: 21T
- Horn type: Cross,star and bar-type
- Excessive play: ≤0.5°